Config — workspace setup
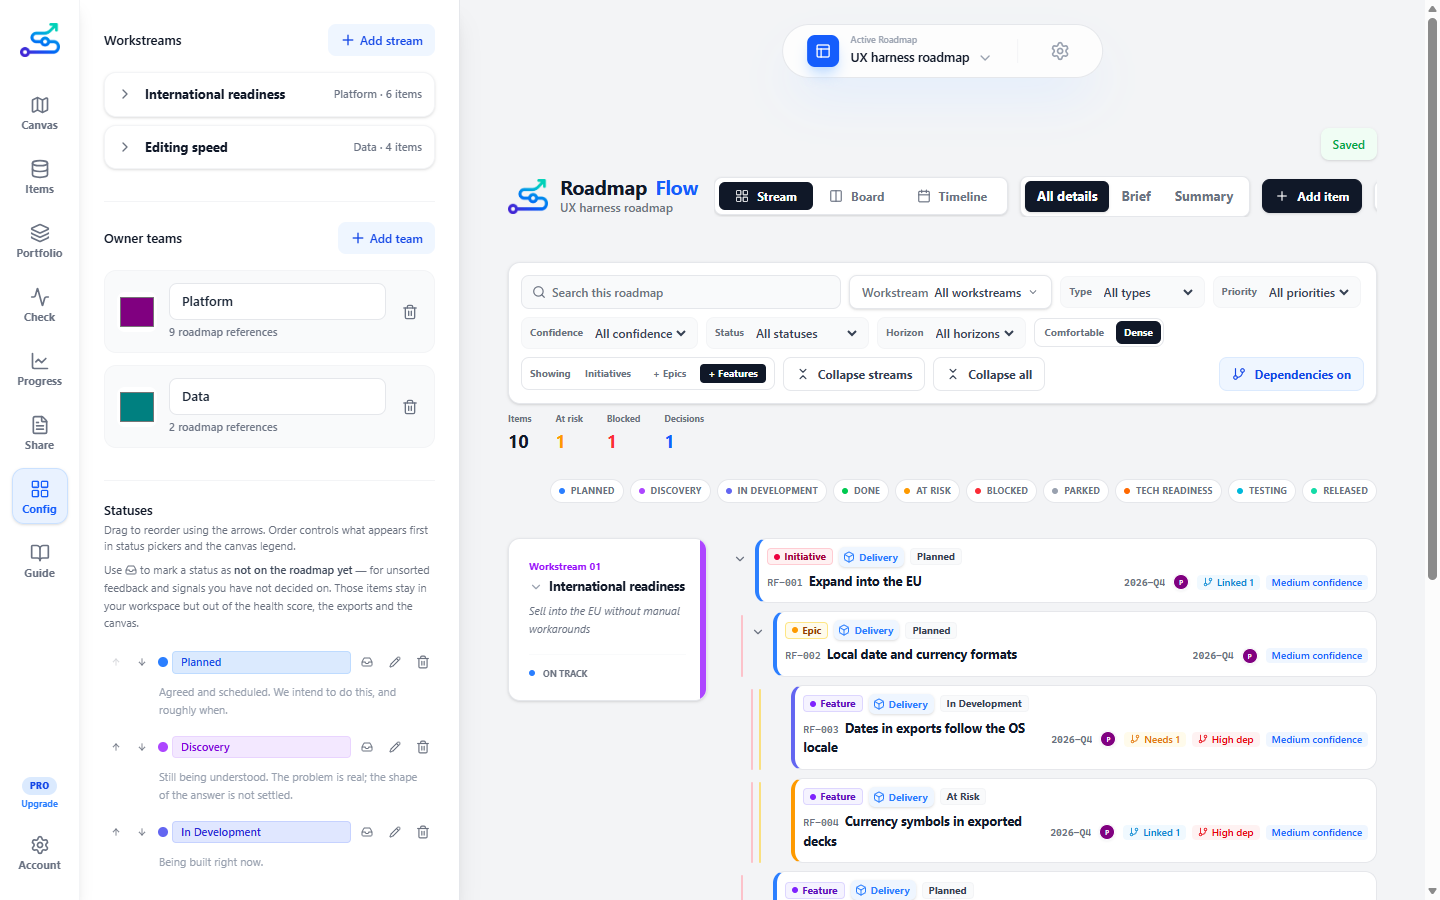
The Config tab is where you set up the structure a roadmap needs before it can be read clearly: workstreams, owner teams, and statuses.
What it does
Config has three sections:
The areas your roadmap is divided into. Each workstream has a name, description (what it covers), outcome (what result it should produce), and owner team.
Workstreams become the rows in Stream and Timeline views.
The teams that can own items and workstreams. Each has a name and a color used on item cards and avatars.
The full list of statuses available across all items. Every status — including built-in ones — can be renamed, reordered, or deleted. New statuses can be added with a custom color.
See Status management.
Two things that used to live here have moved to where the rest of their job is:
- Brand kit is on Share, under Look of the export — it changes what exports look like, and the export preset that decides what they contain is right above it.
- Workspace location is on Team, alongside the shared-folder checklist, the folder path and who is editing. Config still shows you which setting is active and points you there.
When to use it
- At the start, before adding many items — structure first, items second.
- When the product reorganizes and workstreams or teams change.
- When a status list needs renaming, reordering or extending.
When not to use it
- Mid-presentation. Config is setup; do it before the review, not during it.
- As a place to track people. Owner teams are teams, not a staff directory.
3-minute flow
- Open the Config tab.
- Add the workstreams your roadmap needs. For each one, fill in the description (what it covers) and the outcome (the result it should produce).
- Add owner teams and assign them to workstreams.
- If you have Pro, fill in the brand kit for branded exports.
Workstreams
Each workstream has two text fields below the name:
- Description — what the workstream covers. A phrase or sentence that explains the scope: "Customer-facing mobile features".
- Outcome — the result the workstream should produce. Written as the change or benefit the team is working toward: "Customers can complete checkout without leaving the app".
Both fields stay labelled when filled in so you can always tell them apart.
Owner teams
Owner teams are the groups responsible for items and workstreams. They are not a staff directory — use team names like "Platform" or "Growth", not individual names.
Each team has a color that appears on item owner avatars and team references across the canvas.
Status management
Built-in statuses: Planned, Discovery, In Development, Done, At Risk, Blocked, Parked, Tech Readiness, Testing, Released.
To rename a status: click the pencil icon on any row, type the new label, and press Enter or click away.
To reorder statuses: use the up and down arrows on the left of each row. The order controls what appears first in status pickers, the filter dropdown, and the canvas legend.
To delete a status: click the trash icon.
- If no items use that status, a confirmation prompt appears and the status is removed immediately.
- If items use the status, an inline reassignment picker appears. Choose a replacement status, then click Reassign & delete.
To mark a status as not on the roadmap yet: click the inbox icon on its row. A line appears under the row confirming what it does — items at that status stay in your workspace but leave the canvas, the health score and every export. Click it again to put them back. Use it for captured requests you have not decided on; see Unsorted feedback.
To create a status: fill in a label and pick a color in the Add status panel, then click Add Status. Hover a color circle to see its name.
To restore built-in statuses: click Restore defaults below the status list. This adds back any built-in statuses that were deleted without changing or duplicating statuses you already have. Your custom statuses are not removed.
New built-in statuses added in app updates appear automatically the next time the app loads — you do not need to click Restore defaults.
Brand kit — now on Share (Pro)
The brand kit moved to the Share tab, under Look of the export. It sits directly beneath the export preset, because the two answer one question between them: the preset decides what a deck contains, the brand kit decides what it looks like. See Brand kit.
Workspace location — now on Team
Choosing whether your workspace lives in a synced folder moved to the Team tab, next to the shared-folder checklist, the folder path, Show folder, Reload latest and who is editing — the rest of the same job. Config shows you which setting is active and links you there. See Team workspace coordination.
Common mistakes
- Too many workstreams. If a stream has one item, it is probably not a stream.
- Leaving workstreams without an outcome — the outcome is what makes a stream mean something beyond a label.
- Deleting a team without noticing it leaves items unassigned. The items stay; they just become unowned until you reassign them.
Related guide pages
Availability
Free. Workstreams, owner teams, and statuses are free; the brand kit is Pro; workspace location is Team.